


English version of the article here.
Lacquering Work
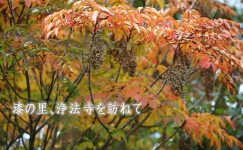
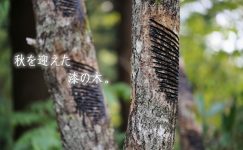
With autumn fully here, lacquerers are currently in the thick of filling orders for New Year’s soup bowls.
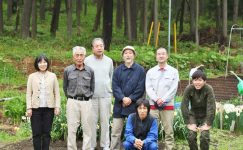
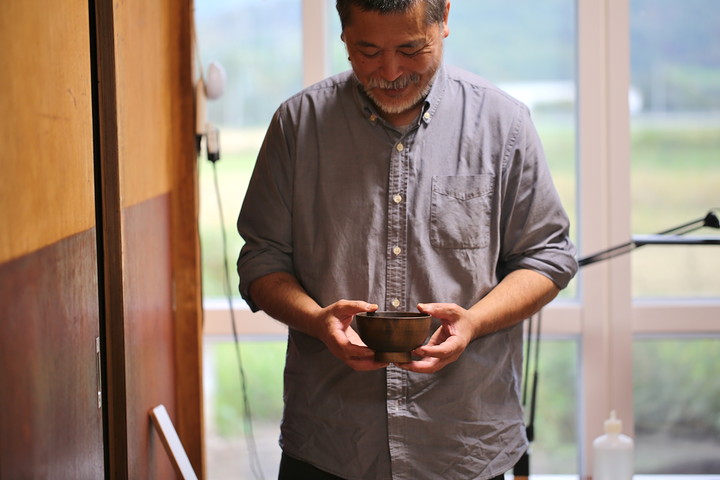
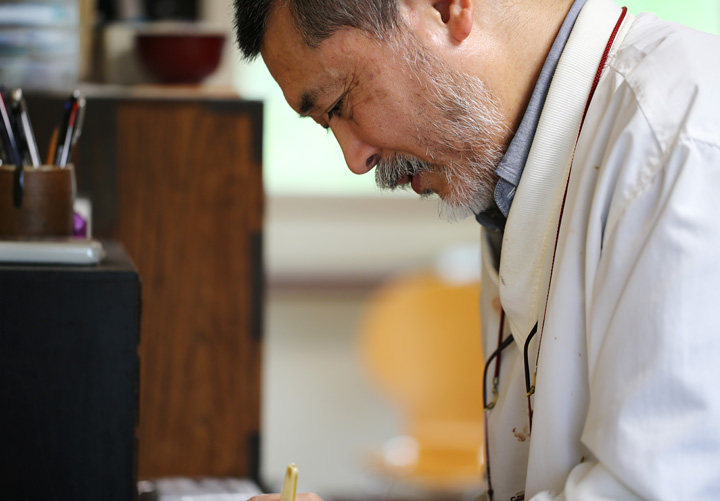
At such a time, we visited the workshop of Mr. Yasuo Tamayama
to watch the final top-coating process.

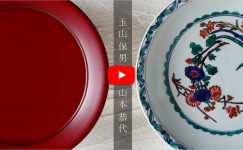
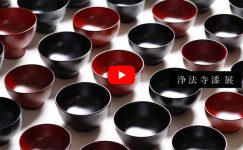
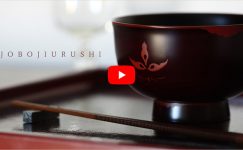
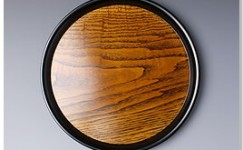
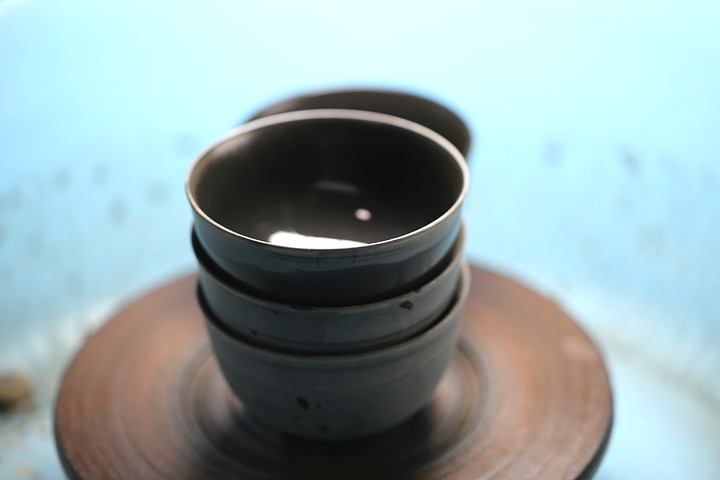
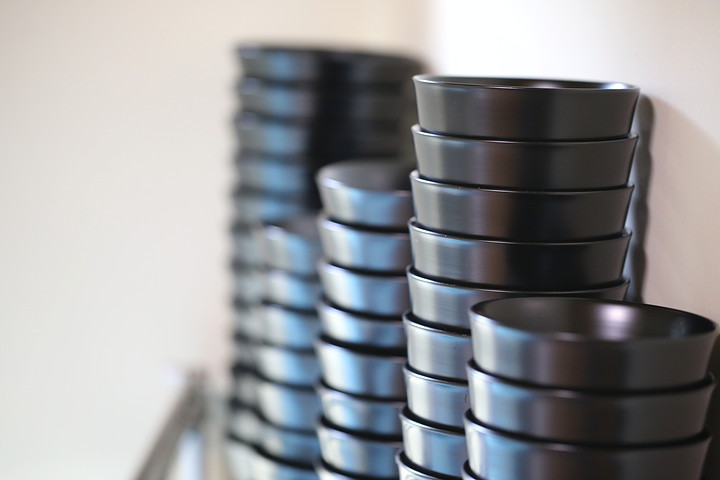
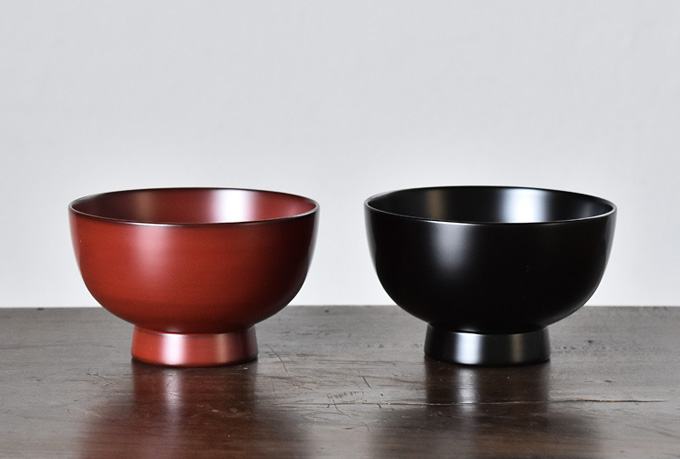
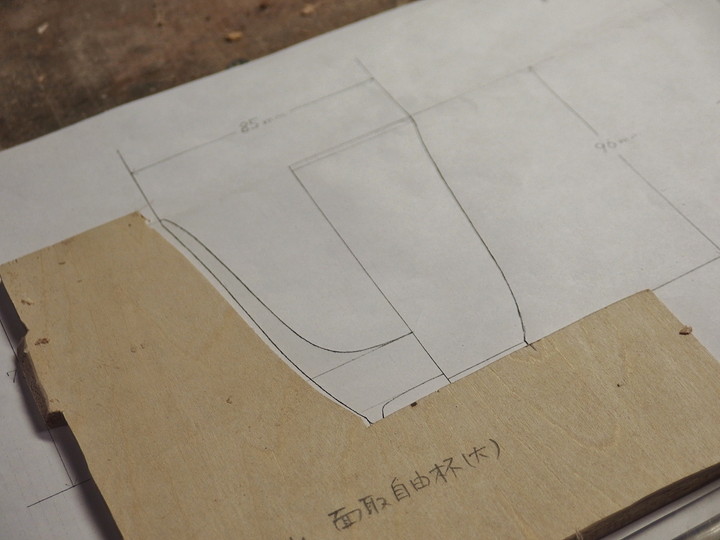
Vermilion and Black Lacquer Soup Bowls
For many years, Hanada has commissioned Mr. Tamayama to make vermilion and black lacquer soup bowls.
He uses domestic hardwoods.
The fine, even grain of the wood harmonizes with the simple design,
resulting in an elegant bowl that has long been cherished by many.
Many Steps in the Process
Lacquering is completed through many stages.
Wood sealing, base coating, middle coating, and final coating—
each step requires repeated cycles of “apply” and “dry,” and from the base coat onward, “polish.”
The work advances through careful repetition over time.
Wood Sealing and Base Coating
A woodturner carves the shape of the bowl from raw wood,
and the lacquer artisan’s work begins from that finished wooden base.
First, the fine bumps are removed with sandpaper,
and lacquer is allowed to soak deeply into the carefully smoothed wood.
A thorough sealing at this stage prevents moisture absorption and shrinkage,
and ensures the finished bowl is strong and durable.
Base Coat and Middle Coat
By repeating coating and polishing, the lacquer film gradually gains thickness.
Using lacquer for the middle coat and polishing it repeatedly with whetstones
is a technique unique to Jōbōji, a region known for its lacquer.
Although these layers are not visible once finished,
the base and middle coats are essential for ensuring the durability of lacquerware.

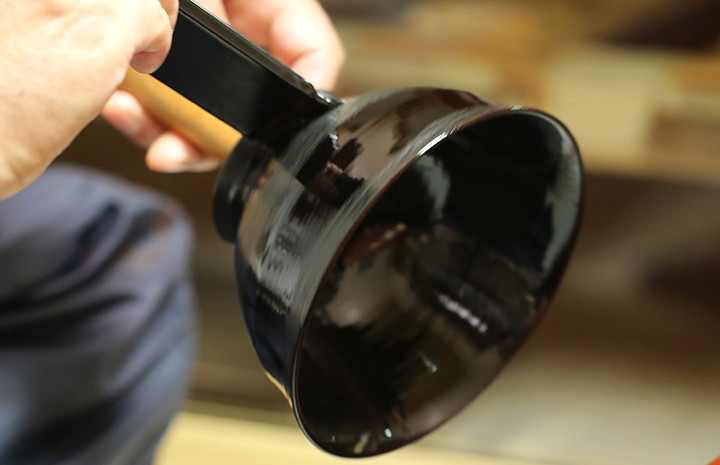
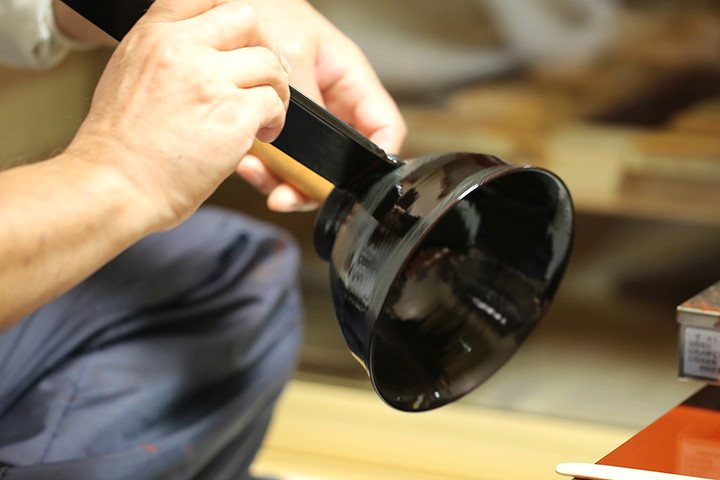
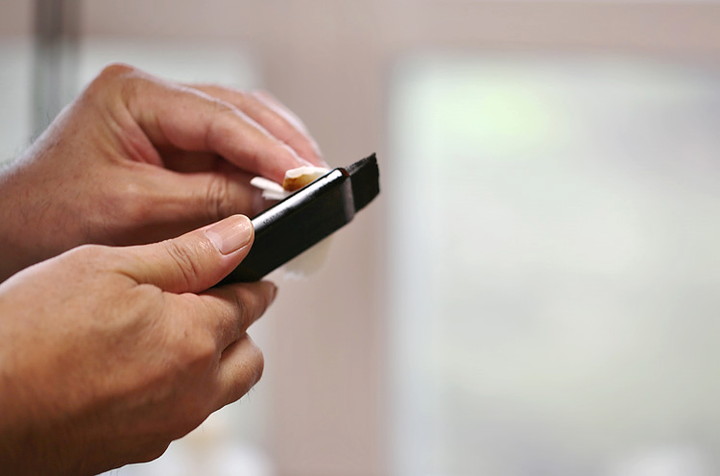
Top Coating
The final stage, top coating, is done in a special room.
Because not even a speck of dust can be allowed to settle,
the work is carried out in an isolated top-coating room.
Before applying the final coat, the entire room is wiped down, and once all tools are prepared,
the artisan changes into clothing reserved for top coating before entering.
Every step is taken with the utmost care to achieve a flawless finish.

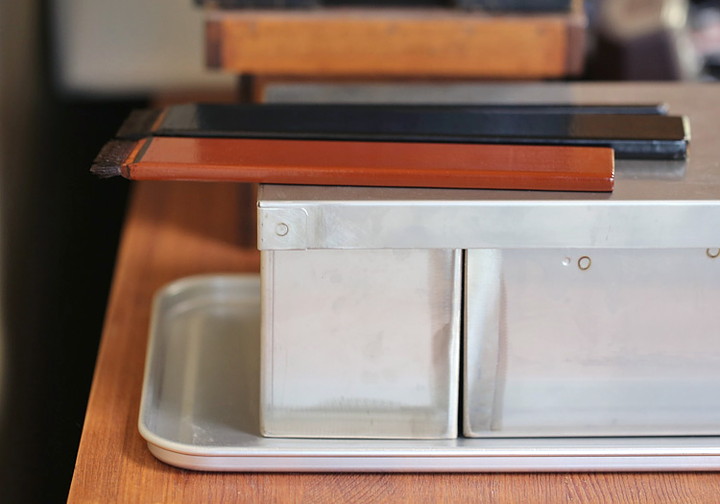
Tools
The brushes used for lacquering are rare, made from women’s hair.
They are usually kept safely in a box with a lid to protect them from dust.
Mr. Tamayama also kept his neatly stored in a box with custom dividers.
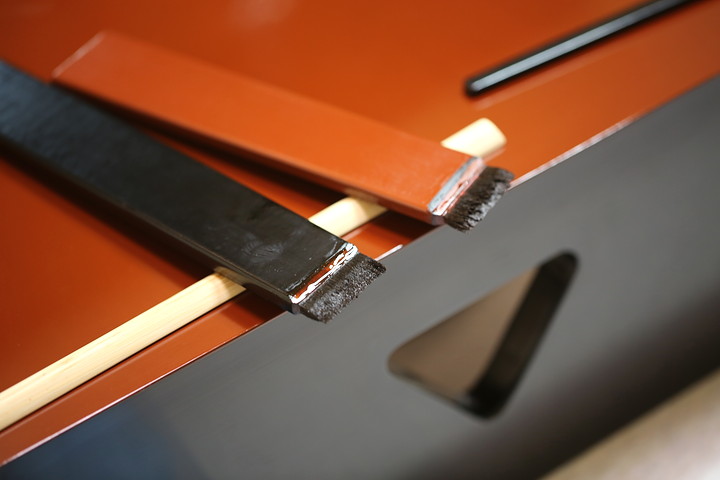
These brushes are uniquely made, with hair extending into the handle,
allowing the artisan to advance new bristles as needed.
Too many or too few bristles make lacquering difficult, so the adjustment is delicate.
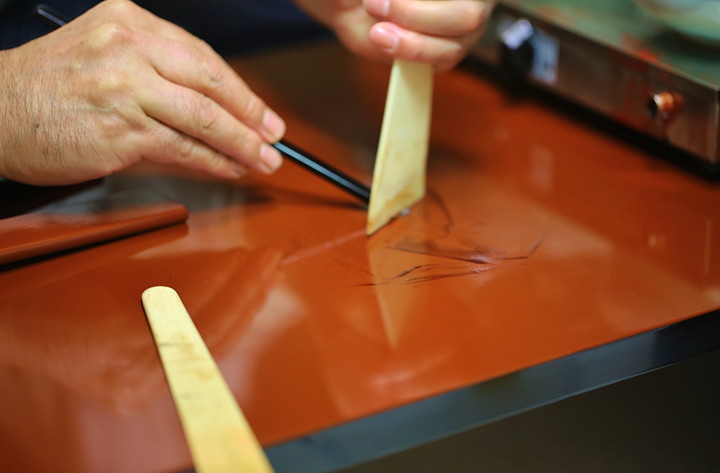
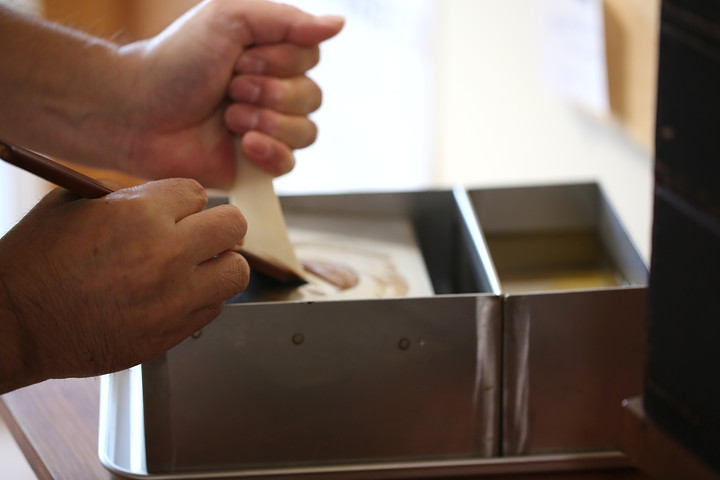
Before starting, the brush is checked for dust.
A small amount of lacquer is worked through the bristles and scraped with a spatula to remove particles.
This is repeated three to four times to ensure the brush is completely clean.
Next, dust is removed from the bowl itself.
Dust is the greatest enemy of the final coat.
Each step is carried out carefully and thoroughly.
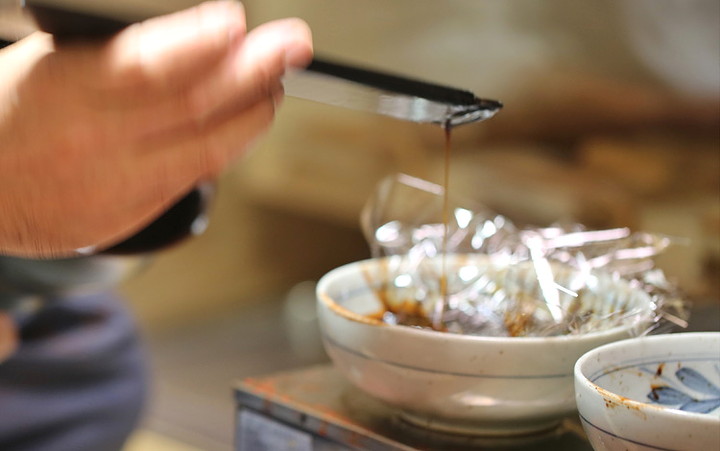
Now, the lacquering begins.
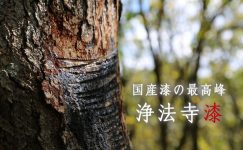
Mr. Tamayama uses domestic Jōbōji lacquer.
From here, the work moves quickly.
He begins with the inside of the bowl.
By moving both the brush and the bowl, the lacquer is applied in smooth circular motions.
The pace is much quicker than one might imagine.
The lacquer absorbed into the brush is used efficiently in one swift motion.
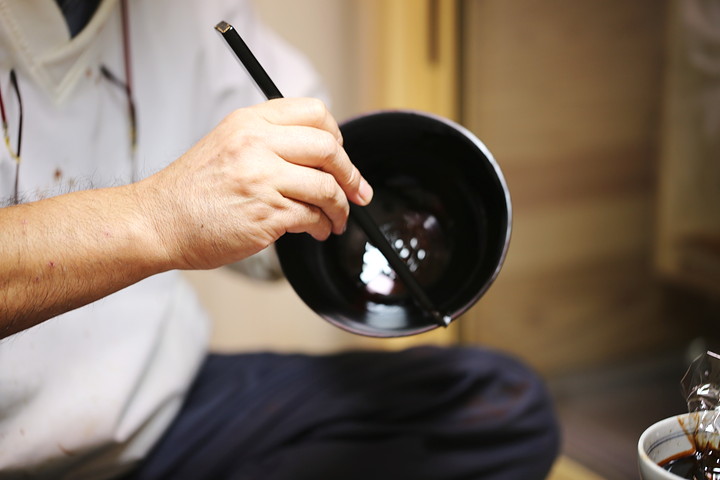
After several passes inside, he moves on to the outside.
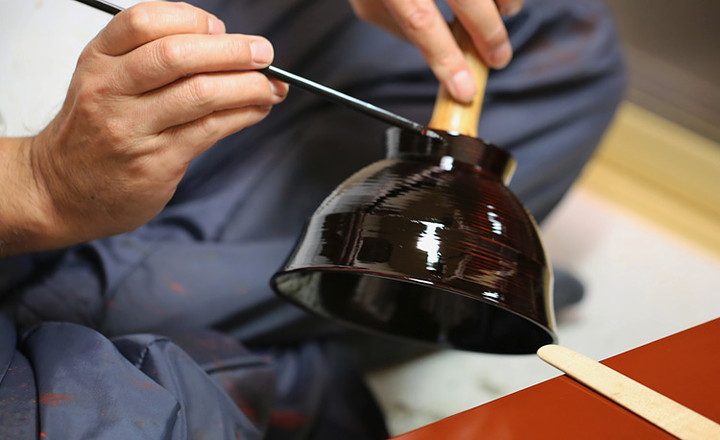
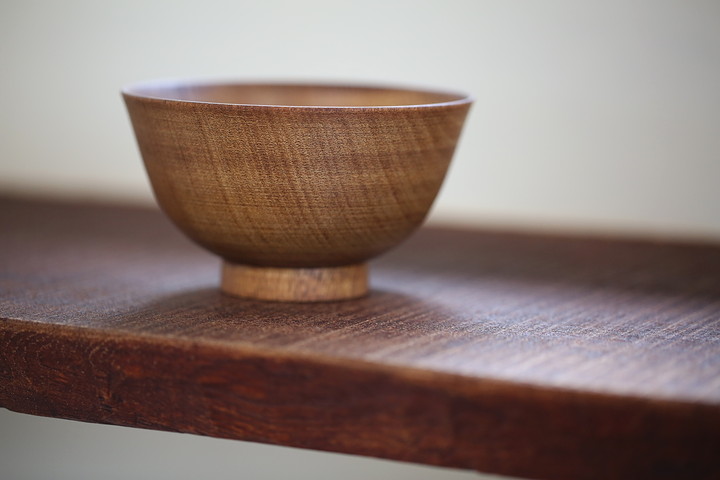
Fine details, such as the foot of the bowl, are carefully finished.

Freshly applied lacquer has a vivid sheen.
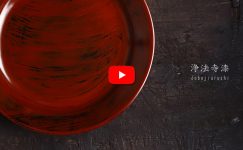
This bowl features a turned pattern from the lathe.
The fine rings catch the lacquer, creating water-like ripples.

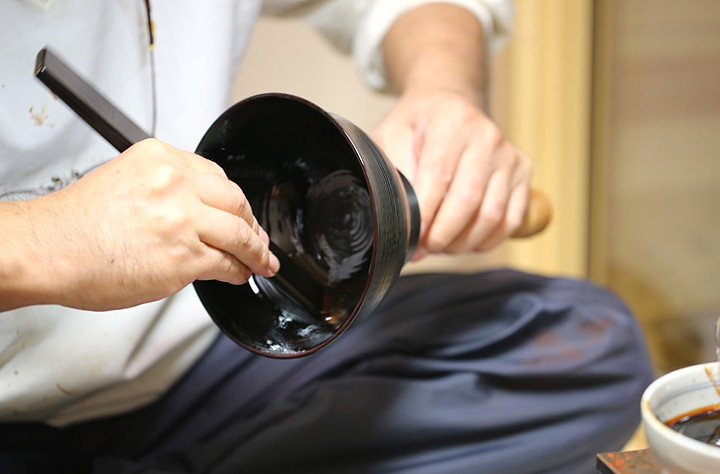
The bowls are placed in a humid rotating chamber used for drying lacquer.
They are slowly rotated at intervals so the lacquer does not run or create uneven spots,
and the final stage proceeds.
The timing of rotation and drying is adjusted each time according to the lacquer and the weather.
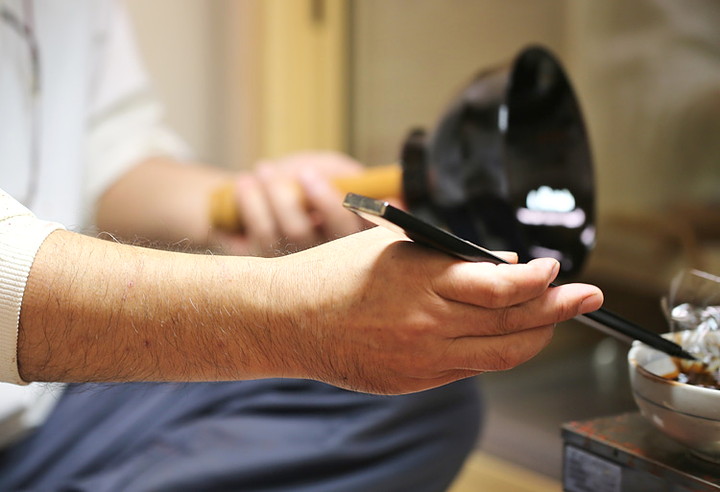
Once the final coat is applied and the artisan leaves the room, there is a moment of relief.
All that remains is to monitor the drying and wait for completion.
Care of the Tools
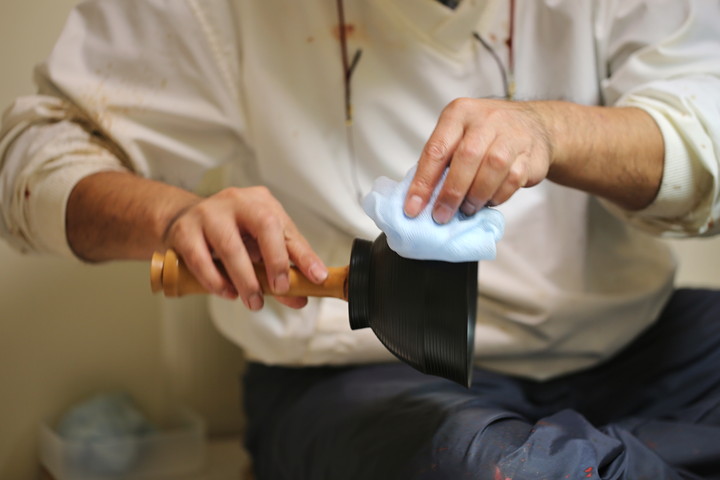
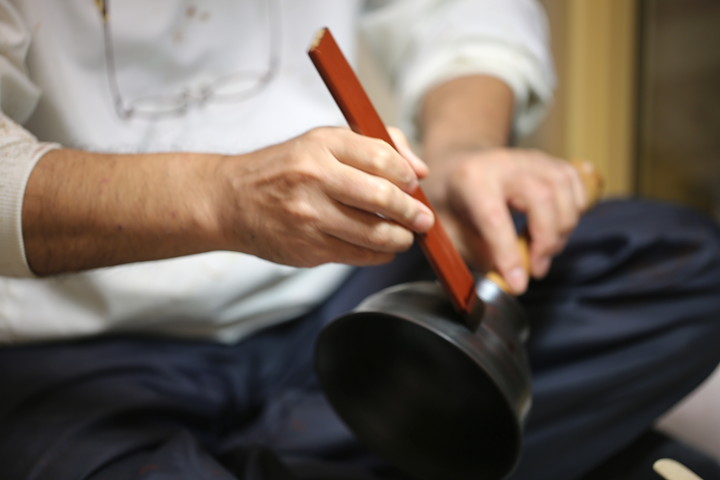
The next task is caring for the tools.
The brush used for lacquering is cleaned thoroughly, with oil used to remove the lacquer.

This cleaning must be done with great care.
If lacquer remains and hardens, the brush becomes unusable.
The oil is wiped away completely, preparing the brush for the next top coating.
By drawing out fresh bristles over the years, the brush can be used for a long time.
For a lacquer artisan, the brush is both a tool and a trusted partner in their work.
Completion
This is only the process for the final coat.
We came to understand just how delicate and precise each step must be.
Even when using Jōbōji lacquer, the lacquer’s condition varies subtly depending on the climate and season of harvest.
The artisan must also adjust the mixture each time.
With attention to timing and drying at every stage, each soup bowl is carefully brought to completion.
A soup bowl completed through such careful work.
The quiet beauty of Jōbōji lacquer adds refinement to everyday life.
Yet the lacquer artisans of Jōbōji, including Mr. Tamayama, all say the same thing:
“It’s thanks to the quality of the wood,” and “It’s thanks to the lacquer.”
Woodturners, lacquer tappers, and lacquer artisans respect each other’s work,
and feel gratitude for the advantages of working in a lacquer-producing region.
This strong, longstanding connection is what supports Jōbōji lacquerware.
On the way back to Morioka Station, Mr. Tamayama shared a story with us.
“I can’t explain anything without drawings, but Mr. Iwadate and Mr. Yonezo (the woodturner Mr. Yonezo Sasaki from Hirono, Iwate) are amazing.
Once, I happened to see Mr. Iwadate asking Mr. Yonezo to make some bases.
There were no detailed measurements at all—just things like ‘something like this, in that way.’
And Mr. Yonezo simply said, ‘All right, I’ll take care of it.’ I was astonished.
At that moment I thought, I can never match the two of them.”
“Mr. Yonezo is truly remarkable. I didn’t realize it at first, but he always understands the intention of the lacquer artisan.
I didn’t notice because you can’t tell just by looking at the finished wood base.
One day at his workshop, I saw my drawing with his handwritten notes added to it.
That was the first time I understood.
It was something I hadn’t been able to express in the drawing.
He knew what I wanted to do—better than I did myself.”
He spoke passionately, more about others than about his own lacquering.
In November, we received a phone call from him:
“Mr. Yonezo Sasaki, the woodturner, has been selected as a Contemporary Master Craftsman!”
His voice was full of pride.
The lacquer artisans of Jōbōji must be truly delighted and celebrating him—
the scene came vividly to mind.
※ “Contemporary Master Craftsman,” awarded by Japan’s Ministry of Health, Labour and Welfare
This award program, established in 1967, honors highly skilled artisans considered leaders in their fields.
Its purpose is to recognize excellence, inspire young people pursuing craftsmanship, and raise both the status and skill level of artisans in Japan.
≪ END ≫
漆を塗るしごと
秋本番、塗り師はお正月に向けて、汁椀の注文に追われる真っ最中。
そんな折、上塗りの工程を見せていただくため
作者の玉山保男さんの工房を訪ねました。
本朱汁椀と黒漆汁椀
花田が長年玉山さんにお願いしているのは、本朱汁椀と黒漆汁椀です。
材は国産の広葉樹を使用
キメ細やかな木質は、シンプルなデザインと調和して
洗練された汁椀として完成。長年にわたり多くの人に選ばれて来ました。
いくつもの工程を経て
塗りの仕事は、いくつもの工程を経て仕上げます。
木固め(きがため)、下塗り、中塗り、上塗りと
それぞれに「塗る」「乾かす」下塗り以降は「研ぐ」を
何度も繰り返し、手間と時間をかけて作業を進めます。
木固め(きがため)、下塗り
生地師が木を削り出し、汁椀の形を作り
完成した木地から、塗り師の仕事が始まります。
まずはサンドペーパーで、小さな凹凸を取り除き
丁寧にみがいた木地にたっぷりと漆をしみ込ませます。
ここでしっかり木固めを行うことにより
木地の水分の吸収や乾燥による収縮を防ぎ、丈夫な木のうつわが出来上がります。
下塗り、中塗り
塗りと研ぎを繰り返し、漆の塗膜に厚みを付けていきます。
中塗りに漆を使い、砥石で研ぎを繰り返す技法は
漆の産地という強みを生かした、浄法寺塗りならではの技法です。
実際には目に触れない部分ですが、下塗りと中塗りは
漆器を丈夫に仕上げるための大事な工程です。
上塗り
最後の工程、上塗りは特別な部屋で作業します。
上塗りは、塵ひとつの付着も許されないため
上塗り部屋といって、他と遮断し隔離された空間で作業をします。
上塗りの前にはひと仕事。部屋の中隅々を拭き上げ、道具の準部が整ったら
塗り師も上塗り用の作業着に着替えて入室します。
すべては最後の塗りを完璧に仕上げる為、細心の注意を払います。
道具
塗りに用いる刷毛は女性の髪の毛で作る希少なもの。
普段は道具箱に入れて蓋をし、埃や塵がつくのを防ぎます。
玉山さんも独自の仕切りを付けた箱に、きれいに仕舞ってありました。
刷毛は独特の作りで、持ち手の部分にも毛が入っており
少しずつ繰り出しながら使うのだそうです。
刷毛は出しすぎても、少なくても塗り難くなるので、調整は慎重に行います。
塗り始める前に、刷毛に埃や塵が付いてないかを確認します。
刷毛に少量の漆を含ませ、ヘラでしごき付着物を取り除きます。
完全に取り除くため、作業を3~4回繰り返します。
次は漆器本体の埃を落とします。
埃や塵は上塗りの大敵。
ひとつずつ、作業のたびに入念に行います。
いよいよ塗りに入ります。
玉山さんが使うのは、国産の浄法寺漆です。
ここからは手早く塗りが進みます。
まずは内側から。
刷毛とうつわを動かし、グルッグルッと塗られていきます。
想像していたより、かなり早い手さばきで作業が進みます。
刷毛に含ませる漆は、無駄なく適量で1回でサッと行います。
内側を数回塗ったら、次は外側へ。
高台の際など、細かい部分を丁寧に仕上げて行きます。
塗りたての瑞々しい漆。
こちらはロクロ目を生かした汁椀。
細いロクロ目に漆がかかり、水文のような文様が浮かび上がります。
湿度の高い回転風呂(漆を乾燥させる棚)に入れます。
漆が垂れてムラが出来ないよう、一定時間ごとに回転させながら乾燥させて
最後の工程が進みます。
回転や乾燥の時間は、漆の状態や気候をみながら毎回調整するそうです。
上塗りを終えて、部屋から出てくるとホッとひと安心。
あとは乾燥の具合を確かめながら、完成を待ちます。
道具の手入れ
次は道具の手入れです。
塗りに使った刷毛の洗浄。刷毛に付いた漆を油で落とします。
漆を取る作業は入念に行います。
もし漆を取り損ねてしまうと、漆が乾いて硬化してしまい
刷毛が使いものにならなくなってしまうからです。
油をきれいに拭き取って、次の上塗りに備えます。
刷毛は新しい毛を繰り出しながら何年も使います。
塗り師にとって、刷毛は商売道具であり、大切な仕事の相棒なのです。
完成
上塗りだけでこの作業工程。
ひとつひとつを丁寧に行わなくてはならない、繊細な仕事だとわかりました。
しかも使う漆は同じ浄法寺産であっても、採取した年の気候や時期により
微妙に状態が異なるので、漆の調合にも気を配らなくてはなりません。
毎回塗りのタイミングや乾燥に注意を払いながら
汁椀は作られているのです。
丁寧な塗りを重ねて出来上がった汁椀。
シンプルな浄法寺塗の美しさは、普段の暮らしに上質な潤いをもたらします。
しかし、玉山さんをはじめ浄法寺の塗り師は、皆口を揃えて言います。
「木地が良いから」「漆が良いから」と。
木地師、漆掻き師、塗り師はお互いの仕事を尊敬し
漆の産地という地の利に感謝し、協力し合って日々の仕事に励む作者。
そうして根付いた強い結びつきが、浄法寺の漆器を支えているのですね。
盛岡駅までの帰り道、玉山さんが話してくださいました。
「俺なんか、図面がないと何の説明も出来ないんだけど、岩舘さんと米蔵さん
(岩手県洋野町の木地師 佐々木米蔵さん)はスゴイよ。
いつだったか岩舘さんが米蔵さんに、木地の依頼をしている所に居合わせたんだけど
細かい寸法の指定が一切ないの。『あんな感じで、こんな風に』みたいな。
それで米蔵さん『ああ、わかった。やっておく』だって。俺はびっくりしたね~。
その時この2人には敵わないな、と思ったね。」
「米蔵さんは本当に凄いんだ。自分でも気づかなかったんだけど、
塗り師の意図を汲んでくれるんだよね。
気づかなかったというのは、完成した木地を見てもわからなかったから。
ある日米蔵さんの工房に行った時、俺が起した図面に、米蔵さんのメモが書き加えてあって
それで初めて知ったんだ。
それは自分では図面に表せなかった部分だったんだよね。
米蔵さんは、こういうことをやりたいんだろうなって
俺より俺のことわかってくれていたんだよ」
玉山さんは、自分の塗りのことより熱心に話してくださいました。
11月に入り、玉山さんから電話がありました。
「木地師の佐々木米蔵さんが、現代の名工(※)に選ばれました!」
誇らしげに弾んだ声。
浄法寺の塗り師の皆さんが心から嬉しく思い、米蔵さんを祝福している・・・
その光景が目に浮かぶようでした。
※厚生労働省が表彰する「現代の名工」
「卓越した技能者(現代の名工)の表彰」は昭和42年に創設した制度です。
卓越した技能を持ち、その道で第一人者と目されている技能者を表彰するもので、
技能の世界で活躍する職人や技能の世界を志す若者に目標を示し、
技能者の地位と技能水準の向上を図ることを目的としています。
▼浄法寺で開催される 年に一度の漆の品評会、共進会2017年のレポートはこちらから▼


関連記事はこちら